Welcome back to our blog series where we reveal the solutions to LabyREnth, the Unit 42 Capture the Flag (CTF) challenge. Over the last several weeks, we revealed the solutions for each of the challenge tracks. The time has come for us to share the solutions to our last track, the Random track.
Random 1 Challenge: OMG Java
Challenge Created By: Jacob Soo @_jsoo_
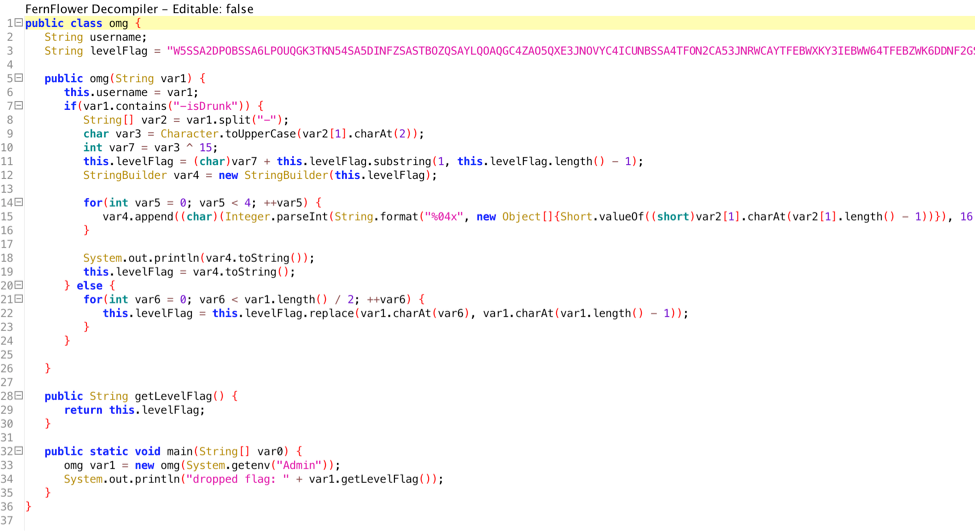
We are given a Java file that we can decompile with ByteCodeViewer.
We can see that we need an environment variable Admin and there is an if condition (if –isDrunk) in the contents of the variable. If we run it with that variable, we get the following output.
|
1 2 3 |
env Admin="Tyler-isDrunk" java omg K5SSA2DPOBSSA6LPOUQGK3TKN54SA5DINFZSASTBOZQSAYLQOAQGC4ZAO5QXE3JNOVYC4ICUNBSSA4TFON2CA53JNRWCAYTFEBWXKY3IEBWW64TFEBZWK6DDNF2GS3THEEQFI2DFEBTGYYLHEBUXGICQIFHHWRBQL5MTA5K7IV3DG3S7IJQXGZJTGJ6QÍÍÍÍ dropped flag: K5SSA2DPOBSSA6LPOUQGK3TKN54SA5DINFZSASTBOZQSAYLQOAQGC4ZAO5QXE3JNOVYC4ICUNBSSA4TFON2CA53JNRWCAYTFEBWXKY3IEBWW64TFEBZWK6DDNF2GS3THEEQFI2DFEBTGYYLHEBUXGICQIFHHWRBQL5MTA5K7IV3DG3S7IJQXGZJTGJ6QÍÍÍÍ |
If we base32 decode the output, we get the flag.
We hope you enjoy this Java app as a warm-up. The rest will be much more exciting! The flag is PAN{D0_Y0u_Ev3n_Base32}
Random 2 Challenge: Can you express yourself regularly?
Challenge Created By: Richard Wartell @wartortell
For this challenge, we’re handed two files: server.py and omglob_what_is_dis_crap.txt. Taking a quick look at server.py, it looks like this is a server running somewhere, accepting connections, checking a regex, and then returning a key if the passed information doesn’t match the regex.
|
1 2 3 4 5 6 7 8 9 |
class DoAThing(SocketServer.StreamRequestHandler): def handle(self): self.request.sendall("Enter your key:\n") msg = self.rfile.readline().strip() if not r.match(msg): self.request.sendall("Correct key. Here's all the passwords: %s\n" % FLAG) else: self.request.sendall("Failure...\n") |
So what’s the regex that it tests against? Well, we see that it reads in the string from omglob_what_is_dis_crap.txt. So let’s take a look at that…
|
1 |
^(.*[^0mglo8sc1enC3].*|.{,190}|.{192,}|.{97}[cgClm]|.{135}[so1l803]|.{81}[e]|.{81}[c3nl8]|.{102}[e]|.{58}[cos]|.{129}[meCln3sc]|.{132}[Cslco]|.{77}[1]|.{173}[l1e30cmg8]|.{166}[m0nle]|.{158}[sngl03c81m]|.{140}[o]|.{68}[g]|.{121}[e1]|.{121}[m8cn]|.{53}[18]|.{123}[1]|.{167}[s]|.{2}[C]|.{171}[c1ms0]|.{76}[03ge]|.{108}[nm8ge301C]|.{11}[0Cec8s3on]|.{50}[18]|.{56}[c]|.{37}[3l1n0]|.{166}[c3]|.{20}[g1]|.{6}[C]|.{115}[13cnm8eg]|.{95}[mo]|.{133}[Cmo0l]|.{53}[0osCm3]|.{147}[gnlme3C81c]|.{18}[3Clcom0n8]|.{154}[egmsCnc8lo]|.{54}[g]|.{144}[1]|.{43}[3Clnec8]|.{138}[3c1sl]|.{104}[0oe]|.{45}[l0C8]|.{103}[c38ol]|.{16}[oc3nC8e0l]|.{31}[C]|.{105}[1col3]|.{150}[g1]|.{124}[38]|.{78}[cmel0sCn1g]|.{183}[m8co30s]|.{145}[o]|.{49}[o1e03sC8]|.{85}[sn]|.{2}[e]|.{150}[moe]|.{57}[le]|.{17}[ne8sm3]|.{185}[om]|.{115}[l]|.{102}[om3Cc8]|.{40}[cnl8gCm]|.{189}[3m1gle]|.{137}[es]|.{178}[C13msneo0g8]|.{136}[C]|.{37}[og]|.{100}[m]|.{64}[mo8]|.{41}[g]|.{87}[3]|.{57}[g]|.{27}[sncl]|.{157}[1emn]|.{55}[83lmson0g1ce]|.{29}[slmcn]|.{53}[l]|.{22}[lgoc]|.{113}[3]|.{132}[83]|.{164}[el3o]|.{148}[eC]|.{30}[m]|.{152}[g]|.{49}[m]|.{87}[l]|.{44}[e1038nolmcC]|.{47}[ec1sngom]|.{90}[ln8o0c]|.{180}[ln0em3oCc1g8]|.{138}[8]|.{178}[c]|.{30}[s3l]|.{73}[c]|.{1}[en]|.{161}[e0g]|.{114}[1g0es8n]|.{154}[0]|.{37}[sec]|.{166}[1C8] |
From this regex we can see three different types of conditions:
- .*[^0mglo8sc1enC3].*
This condition tells us that the regex will match on any string containing characters other than “0mglo8sc1enC3” - .{,190}|.{192,}
This condition tells us that the regex will match on any string that is not 191 characters long, giving us the correct key length. - .{97}[cgClm]
The rest of the conditions look like this one. Each of them gives us a position in the key string, and tells us characters that that position will match on. Essentially, each one is telling us what characters don’t work at certain positions.
So, we need to create a string that is 191 characters long, and use the third type of condition to tell what characters each position can be. We can create a python script that parses the regex and gets out all of the appropriate conditions, then creates a string for us that won’t match those conditions. So feast your eyes below on a regex to parse a regex.
|
1 2 3 4 5 6 7 8 9 10 11 |
import re with open("omglob_what_is_dis_crap.txt", "r") as f: r = f.read() stuff = re.findall(r"\.\{(\d+)\}\[(\w+)\]", r) solution = [list('0mglo8sc1enC3')] * 191 for pos, s in stuff: solution[int(pos)] = list(set(solution[int(pos)]) - set(list(s))) print "".join(map(str, [item[0] for item in solution])) |
When we run this, we get the following output:
|
1 |
gg0ssgccCn8ggs83sggC01n8lecgs311eocc0m0n3C81gmoC1nm1Cn0Cs1g330sgnc0mCc18l18Cco8em0mC80m88csogceemoClCl00nC3gocn0egconsCcm3Clmeglo1lensgmsgnssslels10sglom31mlleg0le80csmnC033nm8oglgs0cellgmmns |
We can now test this regex to see if it works with the server and it will give us the key:
Which returns the key to get us to the next level:
PAN{th4t5_4_pr311y_dum8_w4y_10_us3_r3g3x}
Random 3 Challenge: I'm not sure how they got in or what they were after but they left some cookie crumbs.
Challenge Created By: Anthony Kasza @anthonykasza
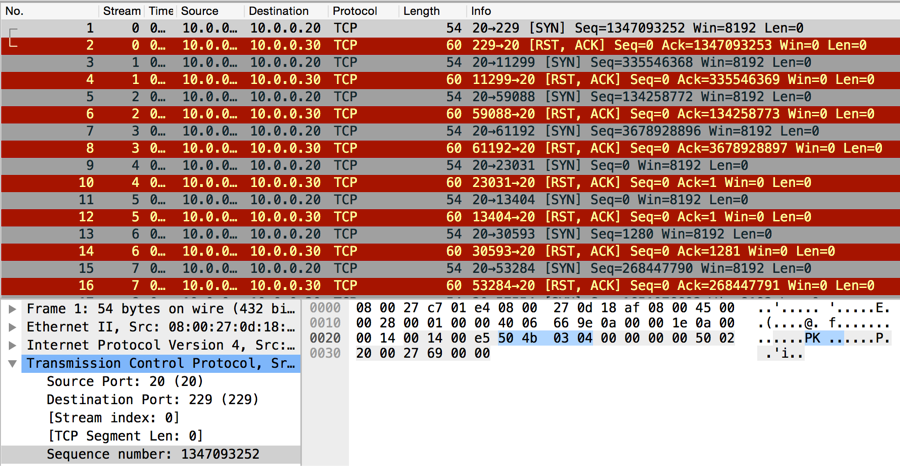
Opening the provided network trace file with Wireshark and observing the IPv4 conversations, participants found only two systems communicating in the pcap. By observing the TCP tab of the conversations menu, participants could see the pcap file contains many connections from a single source port to almost all destination ports. This is indicative of a port scan.
This hypothesis can be confirmed by looking at the content of the TCP connections; there is none. Each SYN packet (except for 7) is responded to with an RST. The remaining seven connections, which responded with a SYN+ACK, were immediately closed with a RST by the originating side of the connection. This pcap definitely contains a TCP SYN port scan.
From this point, participants were required to hunt around in the pcap for the next step of the challenge. The only thing that changes between SYN packets in the trace file are:
- Destination port numbers
- Sequence numbers
- TCP checksums
By observing the first SYN packet of the capture file, participants could locate a zip file header (0x504b0304) within the sequence number. I also tweeted a hint for this challenge referencing DoS cookies, a technology used to prevent SYN floods.
Below is a picture of the zip header in the first packet’s sequence number of the trace file.
A Python script using dpkt could easily be written to extract and reassemble the zip from the sequence numbers of the SYN packets.
Upon extracting the contents of the extracted zip file, participants find 853 numbered files. Opening and observing the contents of the files, participants should have been able to recognize base64 encoding. The files are each “chunks” of a base64 encoded file. By grepping the files for ‘==’ participants could find the last “chunk”, 339.bin. Then, grepping for the beginning contents of 339.bin, “SBAW”, participants could identify a file which overlapped with 339.bin, 531.bin. Participants could continue this manual process and reconstruct the original base64 blob using mad copy and paste skills. Or, a script like this could have been used.
Decoding the base64 blob results in another zip file which contains four images. One of the images contains the flag, PAN{YouDiD4iT.GREATjob}.
Random 4 Challenge: And you thought you hated PHP before you started this challenge
Challenge Created By: Josh Grunzweig @jgrunzweig
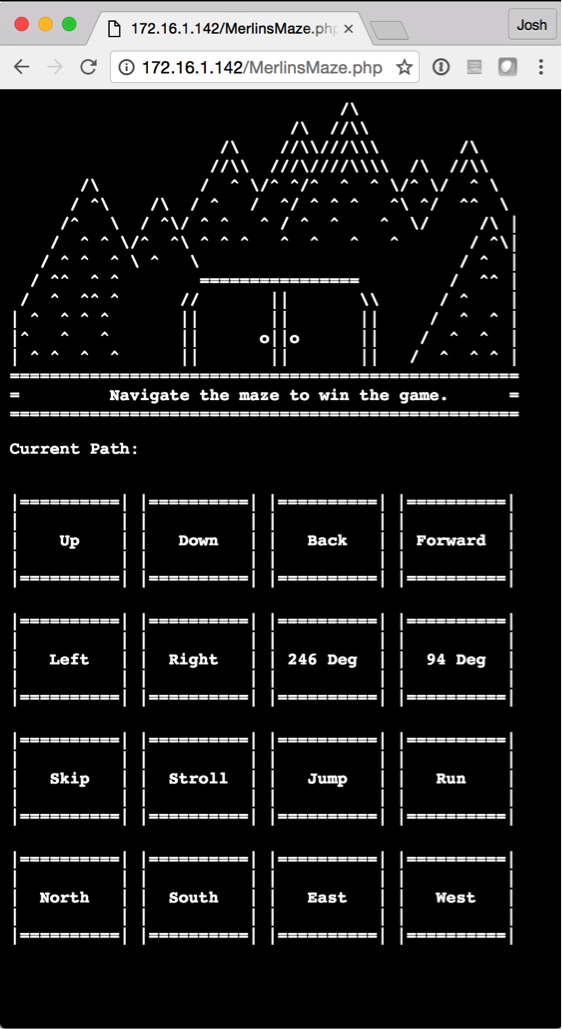
For the fourth challenge in the Random track, users are presented with a PHP script. This particular script weighs in around 1500 lines and presents a user with a text-based maze-like game where they must appropriately choose the correct path to receive the answer.
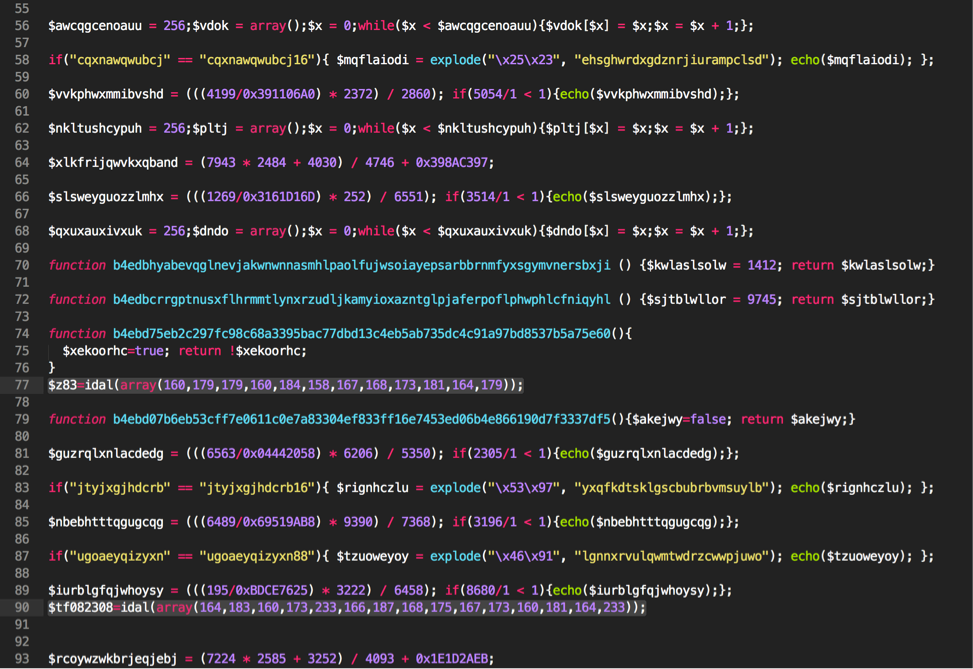
Looking at the underlying code, we see a large blob of obfuscated PHP code, followed by the HTML that generates the data above. The code consists primarily of what looks to be junk code, along with a few lines of unique code scattered within that to actually perform tasks.
Making a copy of this file and removing this junk code provides us with the following:
|
1 2 3 4 5 6 7 8 9 10 11 12 13 14 15 16 17 18 19 20 21 22 23 24 25 26 |
<?php $b99=idal(array(238,239,235,238,164)); $l8d4345=idal(array(168,172,177,173,174,165,164)); $z83=idal(array(160,179,179,160,184,158,167,168,173,181,164,179)); $tf082308=idal(array(164,183,160,173,233,166,187,168,175,167,173,160,181,164,233)); $h2bbd60=idal(array(232,232,250)); $z61=idal(array(164,183,160,173)); $nfa8b0b=idal(array(178,180,163,178,181,179)); $x1418=idal(array(229)); $e7r27=idal(array(177,179,164,166,158,179,164,177,173,160,162,164)); $kx3=idal(array(166,164,181,158,165,164,167,168,175,164,165,158,167,180,175,162,181,168,174,175,178)); $l84=$kx3(); $d7f=idal(array(177,160,162,170)); $tc2e980=idal(array(166,187,168,175,167,173,160,181,164)); $mzoha=null; $l84=$z83($l84[idal(array(180,178,164,179))], idal(array(177,248,247,240,247,246,163))); $p6a = array(); foreach($l84 as $f){$p6a[] = $nfa8b0b($f,5);}; $ke03 = $d7f(idal(array(137,235)),$l8d4345($mzoha,$p6a)); $r80 = idal(array(170,164,241,242)); $e7r27($b99, $tf082308.$x1418.$r80.$h2bbd60, $mzoha); function p96167b($zwaxa){global $nfa8b0b; return ($nfa8b0b($zwaxa,0,5)== idal(array(163,245,164,163,165)));} function idal($zwaxa){global $mzoha; $qoazis34 = $mzoha;for($i=0; $i < count($zwaxa); $i++)$qoazis34.=chr($zwaxa[$i]) ^ chr(193);return $qoazis34;} ?> |
After de-obfuscating the code above, we get a better understanding of what is going on. Comments have been added and the code has been better formatted to show what everything is doing.
|
1 2 3 4 5 6 7 8 9 10 11 12 13 14 15 16 17 18 19 20 21 22 23 24 25 26 27 28 29 30 31 32 33 34 35 36 37 38 39 40 41 42 43 44 45 46 47 48 49 50 51 52 53 54 55 56 57 58 59 60 61 62 63 64 65 66 67 68 69 70 71 72 73 74 75 76 77 78 79 80 81 82 83 84 85 86 87 88 89 |
<?php // Decoded: '/.*/e' $b99=idal(array(238,239,235,238,164)); // Decoded: 'implode' $l8d4345=idal(array(168,172,177,173,174,165,164)); // Decoded: 'array_filter' $z83=idal(array(160,179,179,160,184,158,167,168,173,181,164,179)); // Decoded: 'eval(gzinflate(' $tf082308=idal(array(164,183,160,173,233,166,187,168,175,167,173,160,181,164,233)); // Decoded: '));' $h2bbd60=idal(array(232,232,250)); // Decoded: 'eval' $z61=idal(array(164,183,160,173)); // Decoded: 'substr' $nfa8b0b=idal(array(178,180,163,178,181,179)); // Decoded: '$' $x1418=idal(array(229)); // Decoded: 'preg_replace' $e7r27=idal(array(177,179,164,166,158,179,164,177,173,160,162,164)); // Decoded: get_defined_functions $kx3=idal(array(166,164,181,158,165,164,167,168,175,164,165,158,167,180,175,162,181,168,174,175,178)); // $l84 holds an array of all of the functions within the script. $l84=$kx3(); // Decoded: 'pack' $d7f=idal(array(177,160,162,170)); // Decoded: 'gzinflate' $tc2e980=idal(array(166,187,168,175,167,173,160,181,164)); $mzoha=null; // Decoded: 'user' // Decoded: 'p96167b' // This line performs an array_filter against all of the user functions within // the script. It passes these function names to the the p96167b() function. $l84=$z83($l84[idal(array(180,178,164,179))], idal(array(177,248,247,240,247,246,163))); // At this point, $l84 contains all of the function names in the script that // start with a string of 'b4ebd'. The remaining data from these function names // is appended to an array. $p6a = array(); foreach($l84 as $f){ $p6a[] = $nfa8b0b($f,5); }; // Decoded: 'H*' // This line unhexes the data contained within the $p6a variable. $ke03 = $d7f(idal(array(137,235)), $l8d4345($mzoha,$p6a)); // Decoded: ke03 $r80 = idal(array(170,164,241,242)); // This line does a number of things. It translates to the following: // preg_replace('/.*/e', eval(gzinflate($ke03));, $mzoha ); // Simply put, it will gzinflate and evaluate the data. $e7r27($b99, $tf082308.$x1418.$r80.$h2bbd60, $mzoha); // This function looks at the provided string and performs a 'substr' against // the first 5 bytes. It proceeds to compare it against a string of 'b4ebd' // to see if it's a match. function p96167b($zwaxa){ global $nfa8b0b; // Decoded: 'b4ebd' return ($nfa8b0b($zwaxa,0,5) == idal(array(163,245,164,163,165))); } // This function is responsible for XORing the provided array of // bytes against 193. function idal($zwaxa){ global $mzoha; $qoazis34 = $mzoha; for($i=0; $i < count($zwaxa); $i++) $qoazis34.=chr($zwaxa[$i]) ^ chr(193); return $qoazis34; } ?> |
Using this information, we can decode the provided PHP using the following Python code:
|
1 2 3 4 5 6 7 8 9 10 11 12 13 14 15 |
import sys, re, binascii, zlib, base64 def gzinflate(compressed_data): return zlib.decompress(compressed_data, -15) php_file = "MerlinsMaze.php" php_fh = open(php_file, 'rb') php_data = php_fh.read() php_fh.close() all_data = "" found_function_names = re.findall("function b4ebd(\w+)", php_data) all_data = "".join(found_function_names) print gzinflate(binascii.unhexlify(all_data)) |
This leaves us with the following decoded PHP code:
|
1 2 3 4 5 6 7 8 9 10 11 12 13 14 15 16 17 18 19 20 21 22 23 24 25 26 27 28 29 30 31 32 33 34 35 36 37 38 39 40 41 42 43 44 45 46 47 48 49 50 51 52 53 54 55 56 57 58 59 60 61 62 63 64 65 66 67 68 69 70 71 72 73 74 75 76 77 78 79 80 81 82 83 84 85 86 87 88 89 90 91 92 93 94 95 96 97 98 99 100 101 102 103 104 105 106 107 108 109 110 111 112 113 114 115 116 117 118 119 120 121 122 123 124 125 126 127 128 129 130 131 132 133 134 135 136 137 138 139 140 141 142 143 144 145 146 147 148 149 150 151 152 153 154 155 156 157 158 159 160 161 162 163 164 165 166 167 168 169 170 171 172 173 174 175 176 177 178 179 180 181 182 183 184 185 186 187 188 189 190 191 192 193 194 195 196 197 198 199 200 201 202 203 204 205 206 207 208 209 210 211 212 213 214 215 216 217 218 219 220 221 222 223 224 225 226 227 228 229 230 231 232 233 234 235 236 237 238 239 240 241 242 243 244 245 246 247 248 249 250 251 252 253 254 255 256 257 258 259 260 261 262 263 264 265 266 267 268 269 |
$alalalala = ".backup.bin"; $oilk = "5c59295d2d2461565"; if(!(file_exists($alalalala))) { $jqqqqq = fopen($alalalala, 'w+'); fwrite($jqqqqq, ""); fclose($jqqqqq); } $ukl = ""; if(filesize($alalalala) > 0) { $jqqqqq = fopen($alalalala, 'r+'); $khfmal = fread($jqqqqq, filesize($alalalala)); $ghhhggv = split(", ", $khfmal); fclose($jqqqqq); } else{ $ghhhggv = array();} $oilk = $oilk+"529206651412d2a5d"; $ukl.="16727839782a2524105a4"; if(isset($_GET['path'])){ $p = $_GET['path']; $to_write = ""; $ghhhggv[] = $p; $jqqqqq = fopen($alalalala, 'w'); fwrite($jqqqqq, implode(", ", $ghhhggv)); fclose($jqqqqq); } $ukl.="51550125a203"; function l(){ global $alalalala; $jqqqqq = fopen($alalalala, 'w+'); fwrite($jqqqqq, ""); fclose($jqqqqq); $c = rand(0, 10); if($c<1){ return "A super fluffly dog mauls you to death."; }elseif($c<2){ return "You have been defeated by David Bowie's juggling."; }elseif($c<3){ return "The maze drives you to madness and you spiral into a world of chaos."; }elseif($c<4){ return "Jennifer Connelly's teenage angst defeats you."; }elseif($c<5){ return "You die of dysentery."; }elseif($c<6){ return "You don't really die. You just kind of lie there and give up."; }elseif($c<7){ return "A white owl flies overhead. Oh, also, you lose."; }elseif($c<8){ return "A weird goblin shows up and scares you away."; }else{ return "Jim Henson returns from the dead and possesses you."; } } function c2($okal){ $f=0; if($okal[20]!='f'){$f=4;} if(strtolower(substr("F12AB867ACDBE57",8,2))!=chr(97).$okal[22]){$f=1;} if($okal[25]!='p'){$f=3;} if($okal[22]==$okal[28]){$f=8;} return $f; } $ukl.="b20665a5"; $ukl.="56220565a455"; $k = array(); foreach ($ghhhggv as $a){ switch(trim($a)){ case("Up"): $k[] = "A"; break; case("Down"): $k[] = "0"; break; case("Back"): $k[] = "B"; break; case("Forward"): $k[] = "8"; break; case("Left"): $k[] = "7"; break; case("Right"): $k[] = "F"; break; case("246 Degrees"): $k[] = "3"; break; case("94 Degrees"): $k[] = "C"; break; case("Skip"): $k[] = "E"; break; case("Stroll"): $k[] = "1"; break; case("Jump"): $k[] = "D"; break; case("Run"): $k[] = "9"; break; case("North"): $k[] = "2"; break; case("South"): $k[] = "5"; break; case("East"): $k[] = "6"; break; case("West"): $k[] = "4"; break; default: print "DANGER ".$a; } } $ukl.="55f5023352d295d456c14"; function x_oiflksf($goijas, $oijasf) { $goijas = implode("", $goijas); $o_joijasd = ''; for($i=0; $i<strlen($oijasf);) { for($j=0;($j<strlen($goijas) && $i<strlen($oijasf));$j++,$i++) { $o_joijasd .= $oijasf{$i} ^ $goijas{$j}; } } return $o_joijasd; } $ukl.="022f325f1f16"; function lkj080jo($oilk, $ukl){ return x_oiflksf($oilk, $ukl); } $ukl.="4544424724353666"; $ukl.="544127"; function bxmsadfj($a, $b){ $a.="2b37174a"; $u = pack('H*', $a); return x_oiflksf($b, $u); } function get_key(){return gnfjk();} $ukl.="634a58585c425a2f"; function uan($kfj){ $y = sizeof($kfj); if($y > 20){ $lxkf = implode("",$kfj); if(strrev(substr($lxkf,10,4))!="2156"){return 0;} if($lxkf[5]!=$lxkf[6]){return 0;} preg_match_all('/.{1}(.+)/', $lxkf, $o); if($o[1][0][1]!="6"){return 0;} if(ord($kfj[0])+ord($kfj[18])!=140){return 0;} } if((100/5/2) == 10){return 1;} if($kfj[3]=='1'){return 0;} return 0; } $ukl.="2437665a58345b2f3524541d1"; function gnfjk(){return l();} $ukl.="67154535b61362c325d13"; function lkj($l){ $zl = sizeof($l); if($zl>12){ if($l[3]!=substr("ABCDEFABCDEF",-5,1)){return true;} if($l[20*10/20-2]!=substr("759480376789",5,1)){return true;} if(substr(base64_encode("orb"),1,1)!=$l[9]){return true;} } if($zl>22){ $qzlf = implode("",$l); preg_match_all('/.{19}(.).(.)/', $qzlf, $yy); if($yy[1][0]!="5"){return true;} if($yy[2][0]!="B"){return true;} } return false; } function hj($h){ $z = sizeof($h); $f = 1; if($z > 28){ if(chr(11*6)!=$h[21]){$f=0;} if(chr(49+1+1-(8*0))!=$h[1]){$f=0;} if(chr(ord($h[19])+1)!=$h[27]){$f=0;} if(substr(strrev(base64_encode("!1!Goblin King oh my!1!")),25,1)!=$h[26]){$f=0;} } if($z>25){ if((ord("a")-40)!=ord($h[23])){$f=0;} if(substr("53812E7F82ABFE",5,2)!=($h[17].$h[24])){$f=0;} } return $f; } function c($k){ global $ukl; $sz = sizeof($k); if($sz == 1){ if($k[0] == "F"){ $k1 = "2365"; $x = "AF05236525"; $k1 = $k1+$x; } else { return l(); } } if($sz > 6){ $j = ord($k[5]); if($j != 67){ return l();} } if($sz > 5){ if($k[4] != "4"){return get_key();} } if(uan($k)!=1){return gnfjk();} if(hj($k)!=1){return l();} if($sz>24){ if('A'!=$k[16]){return get_key();} } if($sz > 8){ $o = ord($k[7]); $o = ($o + 17) / 2; $o = $o * 4; $o = chr($o - 56); if($o != 'l'){return l();}else{$key2 = "EB45C";} } if(lkj($k)){return gnfjk();} if(($sz+31) == 63){ if(array_slice($k,29,3)!=array("B","A","D")){return get_key();} $jl = bxmsadfj($ukl, $k); $d = c2($jl); if($d > 5){ $t1 = "You have naviga"; $t2 = "Surprise! You've encountered "; $t1 .= "ted the ma"; $tl = "The Goblin King. "; $t2 .= "the Gob"; /* Hi. Congrats on getting this far. */ $t1 .= "ze and de"; $t2 .= "lin King!"; /* Once upon a time, there was a beautiful young girl whose stepmother always made her stay home with the baby. And the baby was a spoiled child, and wanted everything to himself, and the young girl was practically a slave. But what no one knew is that the king of the goblins had fallen in love with the the girl, and he had given her certain powers. So one night, when the baby had be particularly cruel to her, she called on the goblins for help! */ $t1 .= "feated Dav"; $t1 .= "id Bowie! <p>K"; $tl .= "He shall return with this key: "; $t2 .= "You found the key: "; $t1 .= "ey: ".$jl."</p>"; if(substr($t1,23,1)!=$jl[14]){return str_replace('.','!',str_replace(" ","_",$jl));} if($k[9]!=$k[1]){return $t2;} if($k[31]==$k[0]){return $tl;} if($k[15]==$k[16] and lcfirst($k[15])==$jl[15]){return $t1;} return l(); }else{return l();} }elseif($sz>32){return l();} return ""; } $khfmal = implode(", ", $ghhhggv); $t = c($k); |
At this point we’re able to trace what is happening when we enter various options within the script. Data is written to a ‘.backup.bin’ file to keep track of what data was previously inputted. After stepping through the code and seeing what checks have been included, we determine that the following order must be provided:
- Right
- 246 Degrees
- East
- Back
- West
- 94 Degrees
- 94 Degrees
- Up
- Down
- 246 Degrees
- East
- South
- Stroll
- North
- Left
- Up
- Up
- Skip
- Right
- South
- 246 Degrees
- Back
- 94 Degrees
- Run
- Left
- South
- Run
- East
- 246 Degrees
- Back
- Up
- Jump
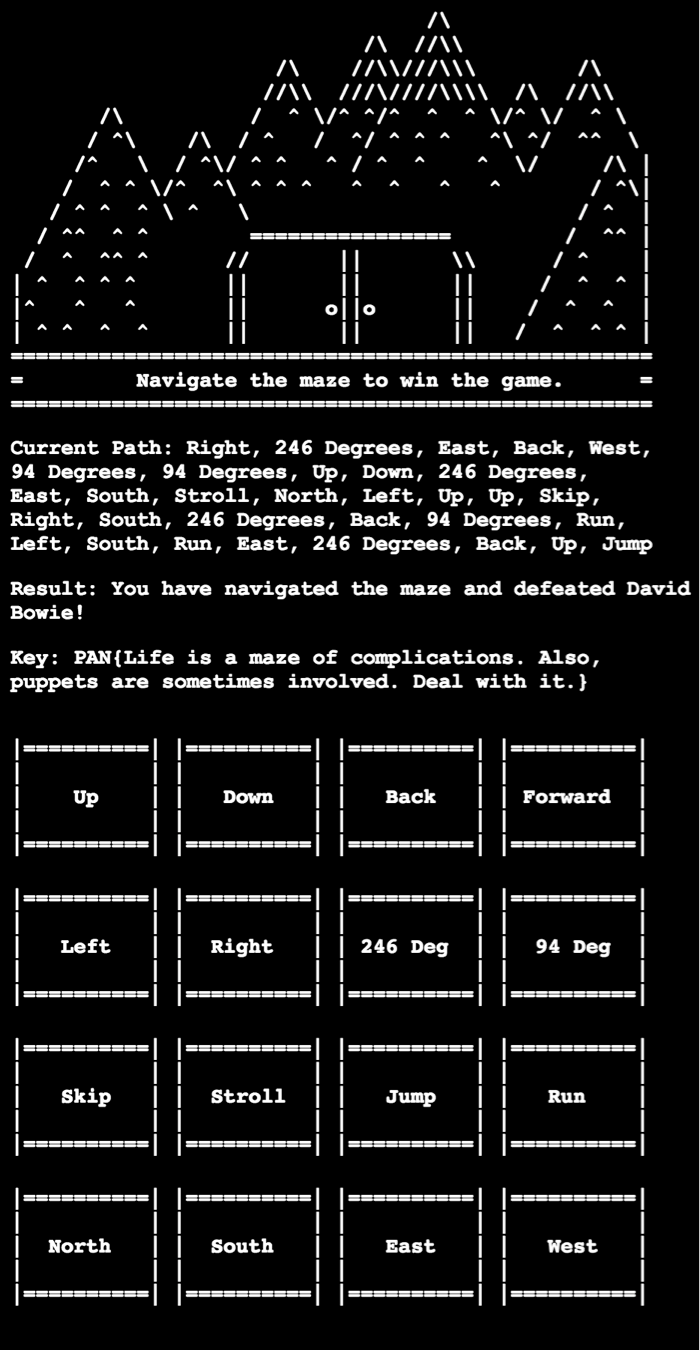
Entering this into the program leaves us with the following:
This leaves us with a key of PAN{Life is a maze of complications. Also, puppets are sometimes involved. Deal with it.}
Random 5 Challenge: You might have to be a snake charmer to crack the newest version of APT Maker Pro. What's the worst that could be in ten lines of Python?
Challenge Created By: Gabriel Kirkpatrick @gabe_k
TLOP is the final challenge of the LabyREnth CTF random track. When you download it, you're given a file called TLOP.pyw. If you run it, it will open a program called APT Maker Pro - UNREGISTERED TRIAL VERSION. There's a button labeled "Generate APT" which informs you that you need to activate APT Maker Pro, and a button labeled "Activate APT Maker Pro!" which brings up a dialog asking for the product key. The challenge here is to find the product key to activate the program, allowing you to generate the APT.
Let's start reversing! TLOP.pyw is a pyw file, not a py file, which is pretty much the same except that on Windows pyw, files don't bring up a command line window. It can be renamed to py if you'd like to print debug info to STDOUT. Once you open up the file, you'll see ten lines of python (get it? Ten Lines of Python? TLOP... it's stupid). Most of the code after the imports simply sets up a TKinter window, which is actually the splash screen. The last line is where it gets interesting:
exec marshal.loads(zlib.decompress(<longgggggggg gibberish string>))
So it's an exec statement being passed the result of marshal.loads, which is loading some zlib'd data. Marshal is the Python module for serializing and deserializing builtin Python types. If we remove the exec and run the same line in the Python shell, we can see the result is a code object. Exec statements in Python accept two types of input, strings of Python code and code objects which contain compiled Python bytecode. Code objects are most often seen used in .pyc files, which are compiled Python files. These compiled Python files are generated when Python modules are imported. Pyc files contain a 32-bit magic number specifying the Python version, a 32-bit timestamp of the compilation, and a marshaled code object. Since we already have a marshaled code object, we can turn this into a .pyc file with the following code:
|
1 2 3 4 5 6 7 |
import py_compile import zlib o = open('stage1.pyc', 'wb') o.write(py_compile.MAGIC) o.write('\x00' * 4) # null timestamp o.write(zlib.decompress(<longgggggggg gibberish string>)) o.close() |
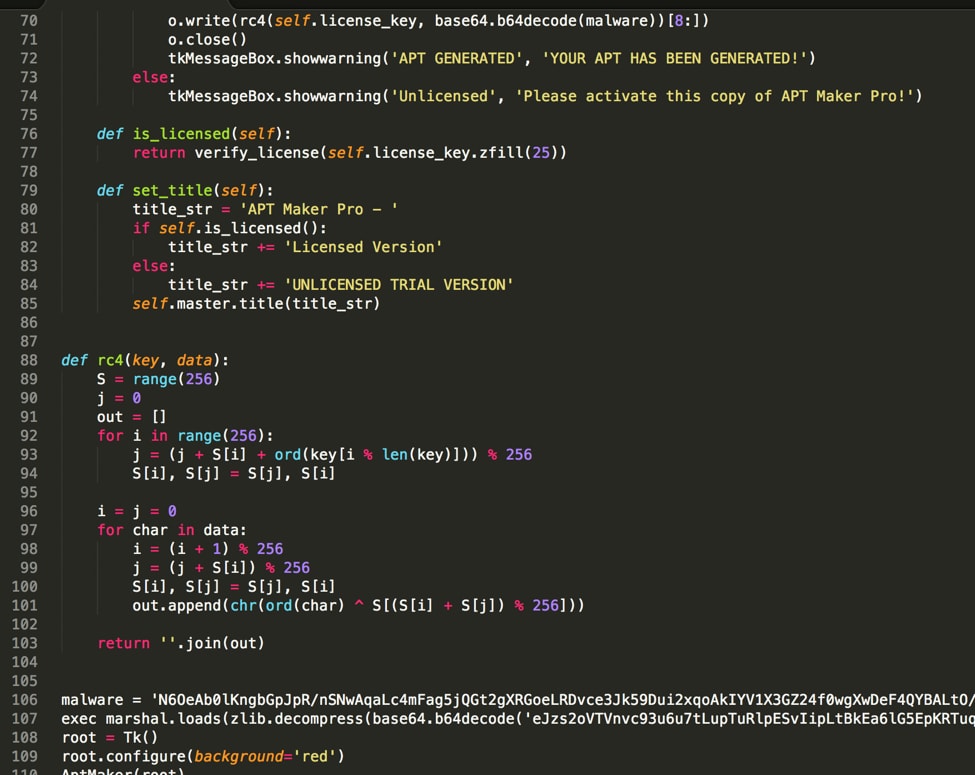
Using uncompyle2 we can decompile the stage1.pyc file we created.
Decompiled output
The resulting decompilation contains a class called AptMaker which contains most of the code for the UI. After the class there is a RC4 function, as well as another exec on the result of another marshal. We can build the exec’d object into another pyc file to analyze it.
|
1 2 3 4 5 6 7 8 |
import py_compile import zlib import base64 o = open('stage2.pyc', 'wb') o.write(py_compile.MAGIC) o.write('\x00' * 4) # null timestamp o.write(zlib.decompress(base64.b64decode(<longgggggggg gibberish string>))) o.close() |
If we attempt to decompile the stage2.pyc with uncompyle2, we get the following error:
|
1 2 3 4 5 6 7 8 9 10 11 12 13 14 15 16 17 18 19 20 21 22 23 24 25 26 27 28 29 30 31 32 33 34 35 36 37 38 |
$ uncompyle2 stage2.pyc # 2016.10.02 23:03:37 PDT #Embedded file name: a ### Can't uncompyle stage2.pyc Traceback (most recent call last): File "/usr/local/lib/python2.7/site-packages/uncompyle2/__init__.py", line 197, in main uncompyle_file(infile, outstream, showasm, showast, deob) File "/usr/local/lib/python2.7/site-packages/uncompyle2/__init__.py", line 130, in uncompyle_file uncompyle(version, co, outstream, showasm, showast, deob) File "/usr/local/lib/python2.7/site-packages/uncompyle2/__init__.py", line 117, in uncompyle walker.gen_source(ast, customize) File "/usr/local/lib/python2.7/site-packages/uncompyle2/Walker.py", line 1406, in gen_source self.print_(self.traverse(ast, isLambda=isLambda)) File "/usr/local/lib/python2.7/site-packages/uncompyle2/Walker.py", line 492, in traverse self.preorder(node) File "/usr/local/lib/python2.7/site-packages/uncompyle2/spark.py", line 692, in preorder self.preorder(kid) File "/usr/local/lib/python2.7/site-packages/uncompyle2/spark.py", line 692, in preorder self.preorder(kid) File "/usr/local/lib/python2.7/site-packages/uncompyle2/spark.py", line 692, in preorder self.preorder(kid) File "/usr/local/lib/python2.7/site-packages/uncompyle2/spark.py", line 687, in preorder self.default(node) File "/usr/local/lib/python2.7/site-packages/uncompyle2/Walker.py", line 1180, in default self.engine(table[key], node) File "/usr/local/lib/python2.7/site-packages/uncompyle2/Walker.py", line 1130, in engine self.preorder(node[entry[arg]]) File "/usr/local/lib/python2.7/site-packages/uncompyle2/spark.py", line 685, in preorder func(node) File "/usr/local/lib/python2.7/site-packages/uncompyle2/Walker.py", line 878, in n_mkfunc self.make_function(node, isLambda=0) File "/usr/local/lib/python2.7/site-packages/uncompyle2/Walker.py", line 1330, in make_function self.print_docstring(indent, code.co_consts[0]) File "/usr/local/lib/python2.7/site-packages/uncompyle2/Walker.py", line 544, in print_docstring docstring = repr(docstring.expandtabs())[1:-1] AttributeError: 'code' object has no attribute 'expandtabs' # decompiled 0 files: 0 okay, 1 failed, 0 verify failed # 2016.10.02 23:03:37 PDT |
Throwing it at other Python decompilers will likely yield similar errors, so we’re going to have to take a different approach. Since it won’t decompile, we can attempt to disassemble the bytecode. Python has a built-in module for disassembling Python bytecode called dis, which we can use to disassemble the pyc file we produced by running the following code:
|
1 2 3 4 5 6 7 |
import marshal import dis o = open('stage2.pyc', 'rb') o.read(8) c = marshal.load(o) o.close() dis.dis(c) |
The following output is produced from the code above:
|
1 2 3 4 5 |
0 LOAD_CONST 0 (<code object verify_license at 0x610458, file "", line -1>) 3 MAKE_FUNCTION 0 6 STORE_NAME 0 (verify_license) 9 LOAD_CONST 1 (None) 12 RETURN_VALUE |
The code output is relatively simple. The first instruction, LOAD_CONST 0, pushes the constant at index 0 in the current code object onto the stack. After that we have MAKE_FUNCTION 0, which pops a code object off of the stack and turns it into a function object. The third instruction, STORE_NAME 0, pops the top item on the stack (the function we just created) and stores it with the name at index 0 in the code object. That name in this case is “verify_license”. What this sequence of instructions does in practice is to create a function named verify_license. We can see the verify_license function is referenced in our previous decompilation inside the “is_licensed” function:
|
1 2 |
def is_licensed(self): return verify_license(self.license_key.zfill(25)) |
The two last instructions simply push the constant None to the stack, and then return it. This is present in all Python code objects that don’t have an explicit return value because all Python code objects must return something.
Now that we know that all this code is doing is creating a function, we can actually run it and use the verify_license function from the Python shell by importing the stage2.pyc file. If we run the following code we can start to play around with the function from the shell:
|
1 2 3 |
>>> from stage2 import * >>> verify_license('A' * 100) False |
From this we know that verify_license is a function that returns a boolean. If we disassemble the function we will see the following:
|
1 2 3 4 5 6 |
0 LOAD_CONST 0 (<code object check_login at 0x2d46e0, file "shell.py", line -1>) 3 LOAD_CONST 1 (None) 6 DUP_TOP 7 EXEC_STMT 8 LOAD_NAME 0 ( ) 11 RETURN_VALUE |
Let’s take a look at this instruction by instruction:
|
1 |
0 LOAD_CONST 0 (<code object check_login at 0x2d46e0, file "shell.py", line -1>) |
First off it’s pushing constant 0, which is a code object, to the stack.
|
1 |
3 LOAD_CONST 1 (None) |
The next thing it does is push constant 1, which is None, to the stack.
|
1 |
6 DUP_TOP |
DUP_TOP duplicates the top item of the stack, so it pushes another None to the stack.
|
1 |
7 EXEC_STMT |
EXEC_STMT is the equivalent of the “exec” keyword in regular Python. It takes three parameters, a code object or Python string, and two optional parameters containing global and local variables. In this case the code object is the one pushed at the start of the function, and the global and locals are not used, so those are the two Nones on the stack.
|
1 2 |
8 LOAD_NAME 0 ( ) 11 RETURN_VALUE |
This code pushes the value stored for name 0 and returns it. Name 0 here appears to be “ “, which is not a valid Python name and is not referenced anywhere else in the function, so it’s safe to assume this gets set by the code run by the EXEC_STMT.
Since there’s not much code in here, we can assume the meat of the code is inside the code object that gets exec’d. We can disassemble that code object by running the following:
|
1 |
>>> dis.dis(verify_license.func_code.co_consts[0]) |
Unlike the previous times we’ve run dis in here, you’ll start seeing incredibly long output that looks something like this:
A bird’s eye view of the disassembly
If we actually let the disassembly run until it’s entirely finished we won’t actually get any useful information. The entire output is thousands of EXTENDED_ARG instructions with increasingly large arguments, followed by a JUMP_FORWARD to the same large value.
So what’s the issue? The Python runtime stores the arguments for Python instructions in a signed 32-bit integer called oparg. Python instructions that have arguments are 3 bytes long, 1 byte for the opcode and 2 bytes for the oparg value. The problem with this is that instructions can only set the lower 16-bits of the oparg, instead of the whole 32-bits. To get around this limitation, Python has an instruction called EXTENDED_ARG, which shifts its argument to the left 16-bits, allowing you to set the upper 16-bit in one instruction, and the lower 16 in the next. If you put multiple EXTENDED_ARG instructions in a row, the Python runtime will simply keep shifting the 32-bit integer that is oparg, and bits will fall off the end. However, if you disassemble that code with dis, oparg is stored in a Python number. Since dis uses a Python number instead of a fixed 32-bit integer, the number keeps on growing with every single EXTENDED_ARG instruction.
After coming across this and a few other issues with how dis handles funky bytecode, I wrote my own assembler/disassembler called pyasm, which we can use to produce a slightly more useful disassembly.
If we run dispy.py on stage2.pyc, we will get stage2.pyasm. The code object we are looking at starts at line 11 in stage2.pyasm, with the actual instructions starting at line 100. By looking at the first bunch of instructions we start to notice a pattern:
|
1 2 3 4 5 6 7 8 9 10 11 12 13 14 15 16 17 18 19 20 21 22 23 |
EXTENDED_ARG 101 EXTENDED_ARG 28169 EXTENDED_ARG 2305 133 * EXTENDED_ARG 0xffff EXTENDED_ARG 356 EXTENDED_ARG 28169 EXTENDED_ARG 2305 133 * EXTENDED_ARG 0xffff EXTENDED_ARG 28185 EXTENDED_ARG 2305 133 * EXTENDED_ARG 0xffff EXTENDED_ARG 602 EXTENDED_ARG 28169 EXTENDED_ARG 2305 133 * EXTENDED_ARG 0xffff EXTENDED_ARG 612 EXTENDED_ARG 28169 EXTENDED_ARG 2305 133 * EXTENDED_ARG 0xffff EXTENDED_ARG 2660 EXTENDED_ARG 28169 EXTENDED_ARG 2305 133 * EXTENDED_ARG 0xffff |
We can see there are consistently two-three EXTENDED_ARG instructions with different arg values, followed by 133 using the arg value 0xFFFF. If we scroll down to the very end of the instructions at line 1390 we can see the last two instructions deviate slightly from this pattern:
|
1 2 |
EXTENDED_ARG 65533 JUMP_FORWARD 52549 |
We can work out the actual argument for JUMP_FORWARD as 65533 << 16 | 52549 which comes out to 0xfffdcd45. Oparg is signed, so it is actually -144059, which is actually a jump back to the second byte of the bytecode, instead of the first byte where it normally starts execution. This is a form of instruction overlapping, since the second byte is the argument for the first instruction, the code is hidden in the arguments of all of the EXTENDED_ARG instructions.
If we open the stage2.pyc file in a hex editor, we can delete the first byte of the bytecode, so that it starts disassembly from the second byte. To do this we just delete the byte at 0x6D in stage2.pyc, then change the 32-bit int containing the length of the bytecode 0x69 from 0x232BC to 0x232BB. Now if we disassemble the file we should see the following at the start of the code:
|
1 2 3 4 |
LOAD_NAME 0x9100 # license_key NOP JUMP_FORWARD 401 NOP |
Now it’s starting to look more like normal bytecode. The first thing it does is load name 0x9100 which is “license key” and then jump forward 401 bytes. If we cut out the 401 bytes after the jump forward and disassemble again we get even more:
|
1 2 3 4 5 6 7 |
LOAD_NAME 0x9100 # license_key NOP JUMP_FORWARD 401 LOAD_CONST 37121 # 0 NOP JUMP_FORWARD 401 NOP |
Cool, we’re starting to get more. Now if we do this a few more times, we start to see some interesting stuff:
|
1 2 3 4 5 6 7 8 9 10 11 12 13 14 15 16 17 18 19 20 21 22 23 24 25 26 27 28 29 30 31 32 33 |
LOAD_NAME 0x9100 # license_key NOP JUMP_FORWARD 401 LOAD_CONST 37121 # 0 NOP JUMP_FORWARD 401 BINARY_SUBSCR JUMP_FORWARD 401 STORE_NAME 37122 # NOP JUMP_FORWARD 401 LOAD_CONST 37122 NOP JUMP_FORWARD 401 LOAD_CONST 37130 # 542 NOP JUMP_FORWARD 401 BINARY_SUBSCR JUMP_FORWARD 401 STORE_NAME 37123 # NOP JUMP_FORWARD 401 LOAD_CONST 37131 # <code object <module> at 0x710800, file "cmp_eq.py", line -1> NOP JUMP_FORWARD 401 LOAD_CONST 0x9100 # None NOP JUMP_FORWARD 401 NOP JUMP_FORWARD 401 EXEC_STMT JUMP_FORWARD 401 NOP |
If we strip out all the JUMP_FORWARD and NOP instructions it becomes easier to see what it’s doing:
|
1 2 3 4 5 6 7 8 9 10 11 |
LOAD_NAME 0x9100 # license_key LOAD_CONST 37121 # 0 BINARY_SUBSCR STORE_NAME 37122 # LOAD_CONST 37122 LOAD_CONST 37130 # 542 BINARY_SUBSCR STORE_NAME 37123 # LOAD_CONST 37131 # <code object <module> at 0x710800, file "cmp_eq.py", line -1> LOAD_CONST 0x9100 # None EXEC_STMT |
It’s taking the variable named “license_key”, and a constant with the value 0, and doing a BINARY_SUBSCR, which allows you to retrieve a value at an index, and then it is storing it in name 37122, which is a string of whitespace. This is equivalent to the following line of Python:
= license_key[0]
It then does the same thing, but instead of using the variable “license_key” it uses const 37122, which if we look is actually a PNG, and it gets the value at index 542 and stores it in a different name 37123, which is also whitespace. After that it loads const 37131, which is a code object, and does an exec. If we look at the code in const 37131 it’s fairly simple:
|
1 2 3 4 5 6 |
LOAD_NAME 0 # LOAD_NAME 1 # COMPARE_OP 2 STORE_NAME 2 # LOAD_CONST 0 # None RETURN_VALUE |
It is loading the two whitespace named variables that we just set up, comparing them, and storing the result of the comparison in a third whitespace named variable. This is where the license key is actually being checked. We can make the program actually spit out it’s key by simply inserting a print statement in this code object:
|
1 2 3 4 5 6 7 8 9 |
LOAD_NAME 0 # LOAD_NAME 1 # DUP_TOP PRINT_ITEM PRINT_NEWLINE COMPARE_OP 2 STORE_NAME 2 # LOAD_CONST 0 # None RETURN_VALUE |
Now if we build the patched stage2.pyasm file with makepy and run verify_license again we can see it print out the correct key:
> from stage2solve import *
>>> verify_license('A' * 100)
1
_
W
4
n
n
A
_
b
3
_
T
h
3
_
v
E
R
y
_
b
3
S
T
!
False
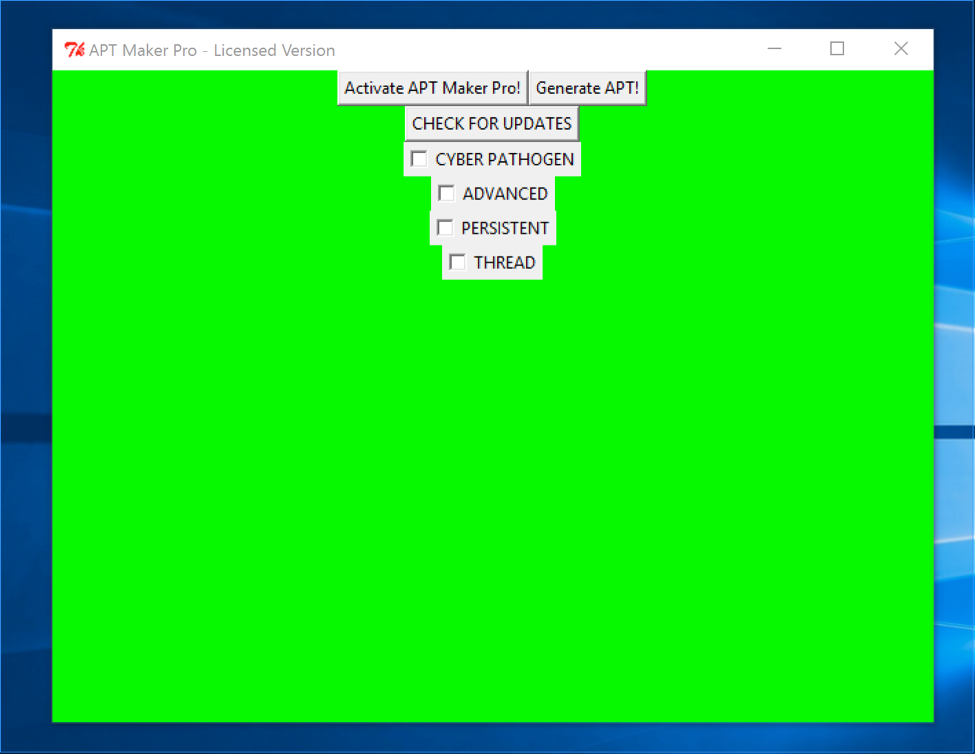
>>>So the license key is “1_W4nnA_b3_Th3_vERy_b3ST!” if we go and plug that into the program we can see that it turns green and activates.
Yay! Now we can press the “Generate APT” button, which creates a file called “EVIL_MALWARE_CYBER_PATHOGEN.pyc”. If we run that it will scroll the ASCII art flag across the screen.
And there’s the flag! PAN{l1Ke_n0_oN3_ev3r_Wa5}!
That’s it folks! We hope you enjoyed participating in these challenges as much as we enjoyed creating them. Be sure to also check out how other threat researchers solved the challenges from this track:
Random 1:
https://0xec.blogspot.de/2016/08/labyrenth-ctf-writeup-random-track.html
https://github.com/uafio/git/blob/master/scripts/labyREnth-2016/labyrenth-2016-random-1.txt
Random 2:
https://0xec.blogspot.de/2016/08/labyrenth-ctf-writeup-random-track.html
https://github.com/uafio/git/blob/master/scripts/labyREnth-2016/labyrenth-2016-random-2.py
Random 3:
https://0xec.blogspot.de/2016/08/labyrenth-ctf-writeup-random-track.html
https://github.com/uafio/git/blob/master/scripts/labyREnth-2016/labyrenth-2016-random-3.3.py
Random 4:
https://0xec.blogspot.de/2016/08/labyrenth-ctf-writeup-random-track.html
https://github.com/uafio/git/blob/master/scripts/labyREnth-2016/labyrenth-2016-random-4.php
Random 5:
https://0xec.blogspot.de/2016/08/labyrenth-ctf-writeup-random-track.html
https://github.com/uafio/git/blob/master/scripts/labyREnth-2016/labyrenth-2016-random-5.2.py
